In the wonderful world of beads, it can be pretty easy to become overwhelmed (so many beads, so much wire, so many findings!), especially if you are just starting out. Here are some tips on how to organize all the beading supplies you have–and those you will acquire.
Everybody’s got his or her own style of organizing, so yours can be as unique as you are. Do what works best for you, but following a few guidelines might help to streamline your creative process.
Assess Your Storage Needs
1
What You Have
Figure out exactly what you have and how much of it you have. Pull out all your supplies, and put them on the table. Get out a notebook and write down what you have – beads, pliers, wire, glue, findings. If you have several main categories of beads, write those down – for example, seed beads, Swarovski crystal, lampwork beads.2
What You Need
Looking over what you have, is there anything major missing that you want to acquire within the next year? Add those items to your list.3
How Your Collection Will Grow
Some parts of your collection will stay relatively the same (i.e. you only need so many pliers). Beads, and perhaps findings, will keep growing. Put a star by the items in your list that will expand over time.4
Other Considerations
Write down any needs your storage system has to meet, such as being able to fit in a certain space, or being portable. Do you have a dedicated space to work, or do you need to put your beads away each time you finish working?Know Your Storage Options
1
Work In Progress Storage
Bead trays, ice cube trays–work in progress storage are open and let you see what you are working on.2
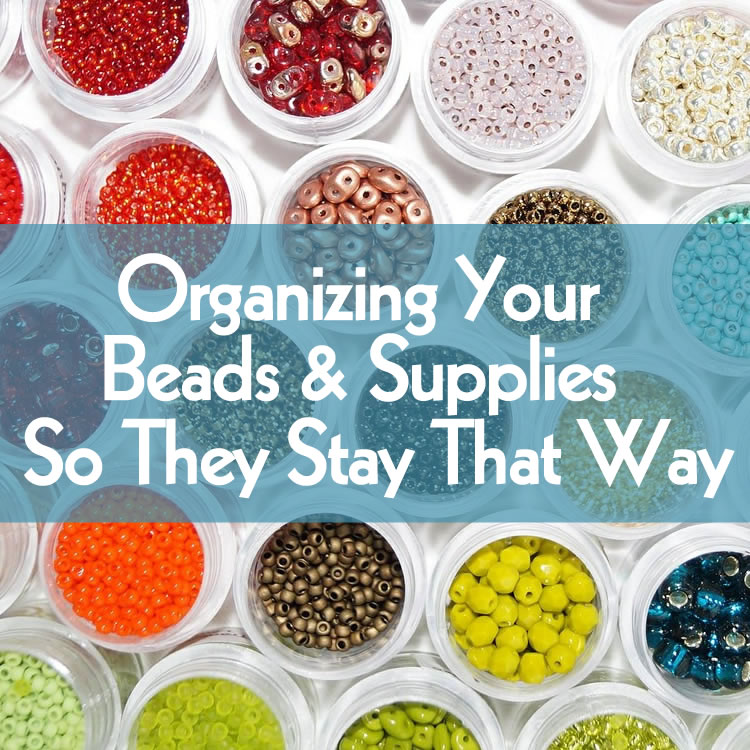
Individual Containers
Tubes, vials, screw-top containers, flip-top canisters, storage boxes, plastic baggies–there are many small container systems you can buy to sort and store your beads. Some are stackable, and some come within larger boxes that keep them organized. The benefit of individual containers is that it’s easy to pour the beads out of them. The downside is that it takes more opening and closing to get to your beads, and it can be harder to see them all at once.3
Divided Storage Boxes
These boxes have multiple compartments where you can see all your beads at once. Make sure the ones you buy are made for very tiny objects like beads–meaning the dividers go all the way to the bottom, and when the lid is closed, beads can’t shift from one compartment to another. Be extra careful with seed beads–they almost always do better in individual containers, both because they don’t shift around, and because you can pour them out.4
Tool Racks
For tools you want to have on hand, like your chain-nose pliers or wire-cutters, a rack is a handy options.5
Pull-out shelves
If you go to an office supply store, or a hardware store, you can see various kinds of pull-out shelves, from the ones made for nuts and bolts, to ones made for paper. Any of these might be useful for organizing tools, wire, or your individual containers.Decide on an Organizational Scheme
It makes sense to keep your findings separate from your beads, but then what? How do you organize all the many types of beads?
It’s up to you, but here are some ideas:
- By quality – You may want to separate your fancy bead-store finds from your run-of-the-mill craft beads.
- By color – Since most jewelry design revolves around color, organizing by color can help a lot when you are working on a design.
- By type or size – Seed beads generally require a different sort of storage anyway (see above), and you may want to separate glass beads from gemstone or wood beads, or small beads from large focal beads.
Put it all together
Now that you have a thorough idea of what is available to you, set it aside for a day or so, and let your unconscious mull it over. Then come back to it with fresh eyes, and start thinking about what fits for you, your needs, and your personality.
There is no perfect system for everyone, and your needs will evolve over time. The key is to make thoughtful choices, and re-evaluate periodically to make sure your choices are still working for you.


It is amazing how quickly beads and supplies can get out of control when you first start beading. Somehow they look so innocent the first time you purchase them, and before you know it they are following you home everytime you go out the door.
My husband bought me good lighting for Christmas and my daughter bought me some plastic storage cases for beads, but I have started using your ice cube idea for the beads I am using on a specific project so while I work on it I only have what I am using out on my kitchen table, Works great! Thanks for the idea.
I use a lot of medium sized food storage plastic containers to keep my sterling silver wire and chain seperate from my silver plated wire and chain. I also keep my tools in a plastic container with shelf liner between the rows of tools to keep them from banging around, but the tool I need always seems to be on the bottom of the container and I am tired of emptying the whole thing out.
I read somewhere about using placemats to make tool holders and tomorrow I am going to give it a try. The instructions were to fold about one third of the length of the placemat up, leaving the top third a single layer of the placemat. Then sew double stitched lines from the fold to the top of the edge that was folded, creating compartments that are the correct size for each tool. On one outside seam also sew in a long piece of heavy ribbon, folded in half. This will be sewn in at the midway point where what was the bottom binded edge of the placemat is now the middle binded edge, so when I roll the tool pouch up I can tie the ribbon around it to keep everything together.
I have three different sets of tools that I use so I plan to get three different colors of placemats. This way when I open the plastic container to get my tools I just pick up one of the tool pouches and I have everything I need.
Does anyone else have clever organization ideas to share?
Loved your info, really helped me. Thanks
Teresa,
Welcome to the world of plastic containers — seems my whole life is compartmentalized by these little wonders! Great idea about the placemat tool holder; you’ll have to let me know how that works out! Clever, indeed. I’m sure there are a million helpful organizational tips out there…I hope a few more pass by this way!
Happy Beading,
Michele
Hi, all!
I buy the divided containers made for beads at the craft store. When I buy a strand of beads that tells me what the beads are (usually size and what stone or cut it is), I cut that part out of the tag and tape it inside the little compartment that I put the stones in. Now I always know what stone my chips and rounds are, and I can buy more of that size if I happen to run out. I also stacked my containers on a bookcase at the foot of my bed (where I bead!) and labeled the containers by what is (generally) in each one. I only have 15 containers so far, but it makes life SO MUCH EASIER!!! (Plus when I pack my kit to teach, I can grab all of my findings in one swoop, all of my chips and/or all of my glass “teaching” beads and don’t have to sort through everything to find what I want.)
I have a separate plastic shoe box for tools and one for wire and stuff that doesn’t fit in the container. My jig and mandrel are in a low, flat container that also sits on the bookcase.
I am NOT an organized person, but fortunately started out with chips. I wanted to remember which stone was which, and came up with the tag idea. It’s carried over neatly to lots of other bead categories.
Any other awesome ideas?
Have fun beading!
Bernice
Good stuff, Bernice! Keep up the good beading (and organizing) work…with much grace in this beloved beading jouney, we can certainly all learn from one another.
Happy beading!
Michele
Hi! I’m new to beading and all the information and tips above are just so helpful!
Mayje,
Get ready for a fun-filled ride! So glad the tips are helpful to you.
Happy beading,
Michele
I took your idea for the placemat toolkit and since i didn’t have an extra placemat laying around, I used a terrycloth kitchen towel. It isn’t pretty, but it is functional and when I am out visiting, the towel doubles as a mat on the table to keep my beads from rolling off my hosts table!
The ice cube tray idea I modified also, my fridge came with this 12 egg holder, which never gets used, since eggs come in a package of thier own… I use it to set out my beads for the project I am working on and the rounded egg shape cups are perfect for retreiving the beads!
Thank you all for the great ideas.
I was going through the beading isle for other containers to organize my beads but they were so expensive! Just so we are awake im 16 so its hard for me to spend more cash then nessesary. But one storage thing that i had bought that i LOVE is a tackle box haha. It has a lot of heavy duty compartments that your beads wont slip under but then i can lift it up at the bottom and i have room for all of my tools and wire. Also i always keep a bag down there for my unwanted beads to put in thereto reduce and for my little cousin who i hope to get into the spirit of beading (: just an idea haha. hope it helps
Hi. I keep my beads in plastic craft/ cross stitch thread containers that have separate areas. Then I keep my beads in little plastic bags to keep them separate from other beads, The bags are usually 2×3, 2×2 and 1×2, I get them from the craft section at Walmart. I keep my beads by color and kind. I label the container so I know what’s in it.
Thank you my fellow jewelers for sharing your storage solutions. I’m always so impressed with how ingenious my crafting peers are! Im a veteran crafter that’s new to beading . I’ve been using a small plastic cabinet I bought at the hardware store that has 30 small drawers and then i put 2 dividers in each drawer. Dividers sold separate! 15 cabinets with 30 drawers each = I need a better system!