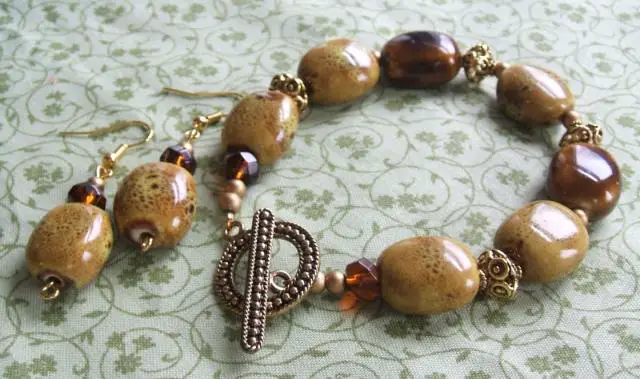
I’m beginning to really appreciate ceramicbeads (as a newbie beader, I thought them gaudy!) and this elegant earring and bracelet set is as easy to create as it is beautiful.
These smaller spacer beads I used were the perfect color and not too obtrusive. For the larger spacers, I used elegant gold ones that complemented the clasp. I tend to favor materials reminiscent of an age gone by, and this toggle clasp gives an antique feel, which adds to the beauty of the ceramic beads. If I had some on hand (which I didn’t!), I might have tossed in some topazSwarovskicrystals to make this bracelet really sparkle.
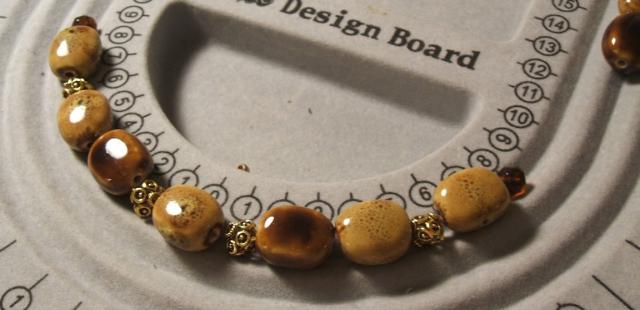
Arrange your beads and spacers on your design board.
2
Start With the Clasp
String your beading wire through your crimp bead, then through the eye of one half of your clasp; bring it back down through your crimp bead, pull the wire taut and use your crimping pliers to crimp the crimp bead.
3
String Beads
String on your beads in the sequence you laid out.
4
Finish the Bracelet
Finish your bracelet the same way you started, adding the other half of your clasp. Using your chain-nose pliers, push the wire tail back through a few beads before snipping it off.
Earrings
1
Add Beads to Headpin
String the beads on eye pins to make your earrings – a large ceramic bead, one faceted bead, and one of your metal-colored beads. You could use headpins as well; since the beads have big holes, just put at least one smaller bead at the bottom.
2
Attach Earwire
Using your round-nose pliers, make a loop at the top of the headpin. Bend it back slightly so it is centered over the headpin. Slip the earwire into the loop and close it.
 I’m beginning to really appreciate ceramic beads (as a newbie beader, I thought them gaudy!) and this elegant earring and bracelet set is as easy to create as it is beautiful.