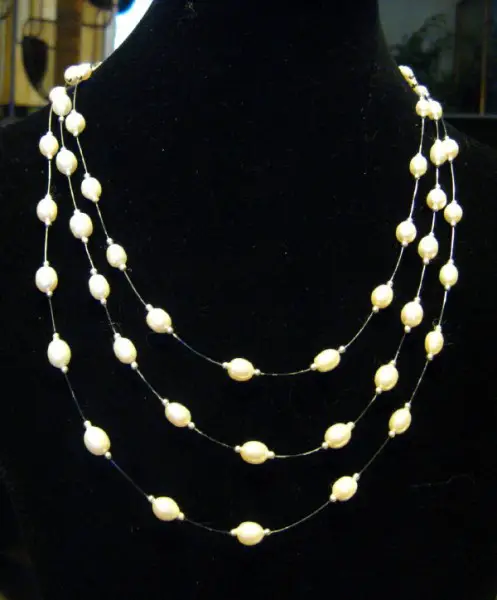
An illusion necklace is much easier than it looks!
The cord, sold on some beading websites, is called invisible cord or illusion cord. It is also sold as fishing line and the technical name is monofilament. I’ve seen it in black and a translucent white, so this necklace can be made for light and darker skin tones.
Cut 3 lengths of cord, each one approximately 1.5 inches longer than the last, and long enough to have finished lengths around 17.5, 19.0 and 20.5 inches, adjusting for neck size.
Select your freshwater pearls. For the classic look, I tried to keep the color of the pearls as consistent as possible, gradually decreasing the sizes of the pearls and matching the size of the pearl to its pair on the opposite side of the string.
Tip: If you want a more varied, eclectic look, make sure the difference in the bead’s size and/or shape is significant enough so a viewer realizes the difference is intentional rather than you tried to match but failed.
Decide on your spacing (# of beads per strand) and string them on the fishing line. Many instructions say to use crimp beads to separate and hold the pearls in place.
Unfortunately, many of my crimp beads are less than perfect. I found Super Glue (gel formula) to be a good alternative.
I strung a 2mm sterling silver bead before and after each pearl. When I had the pearl where I wanted it, I added a small drop of glue to the spot where the edge of the pearl met the cord and then slipped the silver bead over the drop and firmly next to the pearl.
I manipulated and played with the necklace quite a bit. A few beads came loose. I re-glued them and everything has been fine since.
