
If you’re looking for a fun and creative project that you’ll actually wear, few things are more practical than making your own beaded watchband. It looks like a bracelet, but it’s also a watch–beautiful and functional at the same time!
You can pick up a watch face from many stores and bead shops. You can often choose from several styles and colors, and the possibilities are endless. You can make your watch as quirky, elegant or understated as you’d like. Often the watch face is the initial inspiration and gives you a place to start.
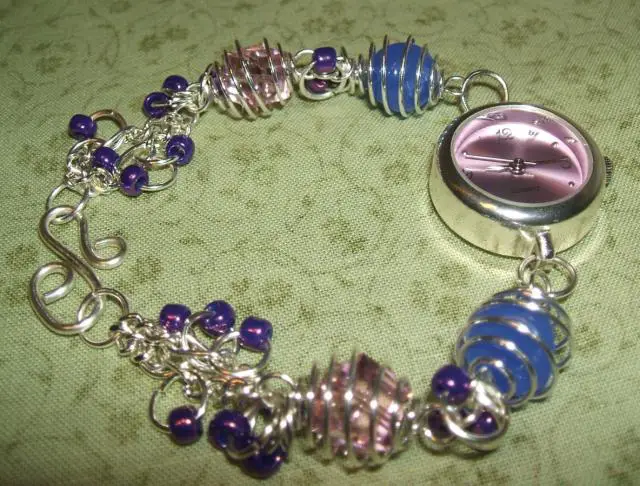
This watch mixes chain and beads to create a colorful and fun look. This is a flexible project that you can customize with your own favorite beads. In my watch, I used a silver toned and light purple watch face paired with blue, lavender, and purple beads. I used round glass beads and light amethyst Swarovski cubes in the bead cages. Once I found the beads I really liked, everything else just fell into place.
Supplies
Tools
Materials
- watch face designed for beaded jewelry making
- chain and jump rings of various sizes that match the metal of your watch face
- 4 spiral bead cages (these let you put other beads inside them)
- large beads that fit inside the spiral bead cages
- pony beads of two different colors
- clasp
Instructions
First, prepare your bead cages by gently spreading apart the wires and pushing the beads inside. They are flexible and should spring back to their original shape.
Next, prepare your jump rings by opening them and slipping pony beads on them. Make a few — you can always make more later.
Everyone’s wrist is a different size, so be sure to measure first so you know the length you are aiming for.
Attach a jump ring to either side of the watch face, and connect those jump rings to your bead cages. Put the most interesting beads near the watch face so they are more visible. Then use more jump rings to attach the next two bead cages.
Now it’s time to add the chain. Measure your watch band so far, plus the length of your clasp, to determine how much chain you need to complete it to your chosen length. Divide that amount in half to get the length of chain you need to cut, and cut four pieces that length. These will be doubled up and used to attach the clasp to the rest of the bracelet.
Put two of the chain pieces side by side and put a jump ring through the top of the two chains, connecting them to each other and to one of the bead cages. Put another jump ring on the bottom of the two chains, connecting them to one half of your clasp. Do the same with the other side of the watch band.
Now it’s time to add color with the pony beads that added to jump rings earlier. Attach them anywhere you like along the chain and the existing jump rings, varying them to your liking.
The end result is an interesting, delicate and whimsical watch–enjoy!


")


, Authentic, Polished Bead Bracelet")