
Table of Contents
- Introduction to Making Hemp Jewelry
- What You Need to Get Started
- How to Choose Hemp Twine
- How to Choose Clasps and Beads
- Helpful Tools
- The Two Basic Knots
- Making a Hemp Necklace Step by Step
- Finishing Your Hemp Jewelry
- Where to Learn More
Intro to Making Hemp Jewelry
 Hemp is a durable fiber made from the cannabis plant. It has 100% legal to wear and create jewelry with, although it is not yet legal to grow in most areas of the USA. Most hemp twine is imported from China and is fairly rough. It is possible to make hemp yarn that is soft, much like linen, but that quality is rare. Still, no matter how rough, any hemp will soften with washing. If you want your hemp jewelry piece to stay stiff like when you made it, try not to take a shower with it. On the other hand, some people like a softer, more worn-in look that can be achieved with washing.
When you make hemp jewelry, you are most likely to use macrame techniques of knotting or braiding to make a thicker cord. This guide will teach you the most common knotting techniques that are used to make hemp jewelry.
What You Need to Make Hemp Jewelry
Required materials
Optional materials and tools
- beading wax to smooth the twine
- beads with large holes and/or charms
- metal clasp and cord tips
- jewelry pliers to attach metal cord tips & clasp
- a way to hold the necklace in place while you create it (shop macrame tools)
Hemp jewelry making kits offer a selection of hemp twine and beads and are an easy way to get started.

How to Choose Hemp Twine
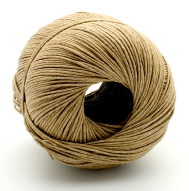 To make hemp jewelry, you first need to select some hemp twine. Although hemp now comes in many colors, the signature “natural tan” color is still the most popular. Most hemp jewelry is made from 1mm or “20 lb” twine. However, thicker twines can be used to good effect, especially for men’s necklaces. Make sure your twine is an even thickness (not too many lumpy bits) and smooth (unless you like the rough texture).

You might want to waxing your hemp or buy already-waxed hemp, if you like a smoother look. Wax helps keep the hemp fibers from fraying and gives the finished piece a more uniform appearance.

How to Choose Clasps and Beads
You do not need any other supplies to make a hemp necklace. However, you may want to add some beads or charms to liven things up, and a metal clasp to make it easier to take on and off.
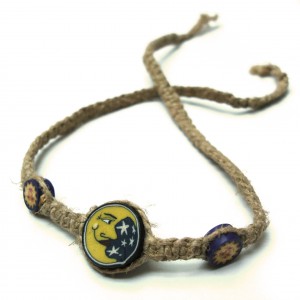
When selecting beads, you want to make sure they have large holes, so your hemp twine can go through them. Crow beads are a good option.

There are many varieties of clasps, but lobster claw is one of the easiest to use and is very secure.

The easiest way to attach a clasp is with metal cord tips. These go over the ends of cord, leather thong, or in this case, hemp. There are several types. The most popular two types are ones with metal flaps that bend over the cord, and ones with a coil, the bottom of which you crimp around your cord.

Helpful Tools
To attach metal clasps, you will need jewelry pliers.

When you are making hemp jewelry, it really helps to have a means to hold it in place. One option is to safety pin it to your jeans or another stationary surface. Some people use clips of some kind and a book or board, or a specially designed macrame jewelry tool.
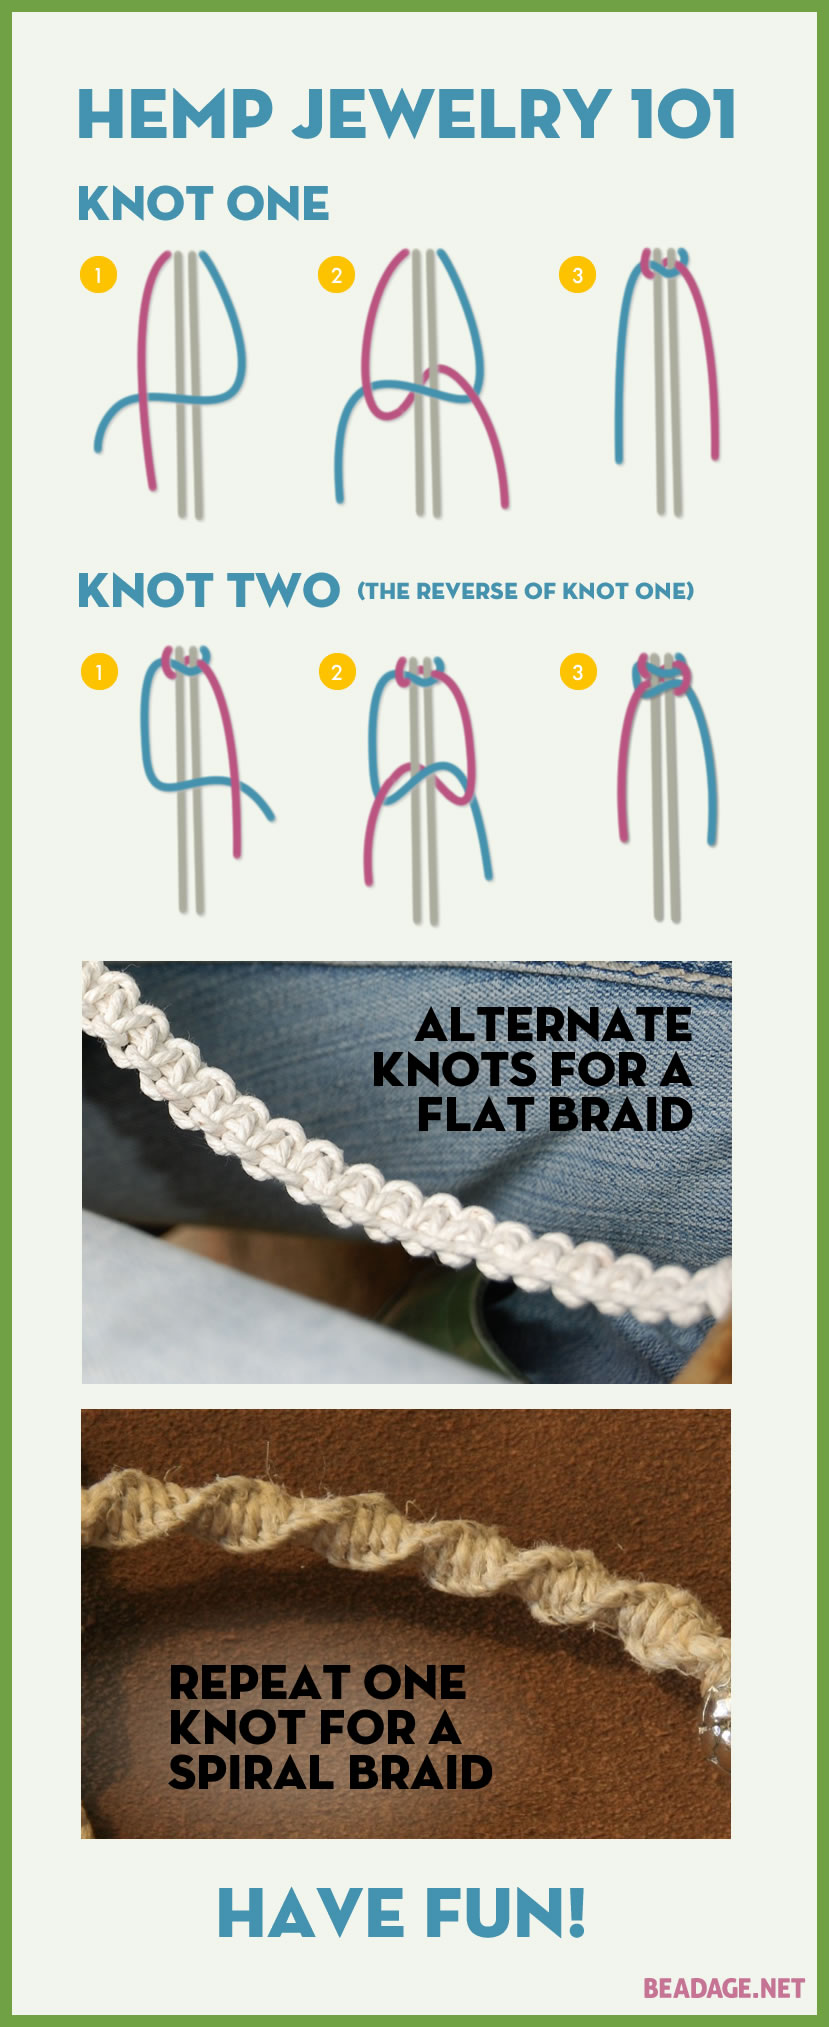
The Two Basic Knots
Most hemp jewelry is made up of two basic knots, which are illustrated below. These knots are the reverse of each other.
If you alternate these two knots one after the other, you will get a flat pattern.If you repeat just one of the knots (either one) over and over again, you will get a spiral pattern that looks like a double-helix.
Making a Hemp Necklace
1
Plan Your Design
Get out your beading board and plan the placement of your beads. You may also want to sketch out what sections will be flat-weave and which will be spiral-weave.2
Cut Your Hemp
Cut 4 lengths of hemp. Two will form the base (pictured in gray above), and these should be a little longer than the finished piece will be. The other two (pictured in blue and pink above) will be used to make the knots and need to be at least 5 or 6 times longer than the finished piece. The length can vary depending on any beads you may add – if you use a lot of large beads you will need less hemp because you will be making fewer knots.If you want a loop at one end of the piece (so you can use a button or knot clasp), cut only two pieces–one for the base and one for the knots. Make them twice as long as you would otherwise, fold them over, and tie a loop.
3
Knot Your Necklace
Start knotting your hemp the way you planned in your design. When you get to a bead, just slide it on over the two base threads, and then tie the next knot snugly below it.
Finishing Your Hemp Jewelry
You have several options for clasps. Experiment and see what works for you!
1
Tie Ends
Allow enough hemp to twist or braid the ends and then tie them together. This is the easiest and simplest way to finish.2
Button Toggle Clasp
This requires some forethought. When you start your piece, instead of cutting 4 strands, cut 2 strands that are twice as long, and then fold them both in half. Tie an overhand knot to make a loop at the folded-over end. Proceed with your knotting and then when you finish, tie a large bead, button, or knot at the other end. When you stick the bead through the loop, it will catch and hold.3
Metal Clasp
You can use a regular clasp if you finish the ends of your hemp piece with metal or wire cord tips. These go over the ends of cord, leather thong, or in this case, hemp. There are two types, one has metal flaps that bend over the cord and the other has a coil, the bottom of which you crimp around your cord. Then use jump rings to add a standard clasp.Learn More
There are many great books about making hemp jewelry if you want to learn more!


 Cap 7 B0017")


 30 Stylish Designs, Easy Techniques, and Step-by-Step Instructions for Intricate Knotwork")

")
")


How to end using clasp was very helpful to me.
I wonder if I could get that same spiral affect with fabric??
Yes, anything thin enough to braid would give you the same effect.
Hi I was wondering if someone could post or email me a picture(I’m a visual person) of how to tie that loop to use a button as my bracelet closure. I was confused reading about using two strings not 4 to do this. Sorry I hope you wouldn’t mind. Thank you for the wonderful guide.
So, normally you would use 4 separate lengths of string of a certain length, let’s say 10 inches. So instead of that, start with 2 lengths of string that are twice as long – so, 20 inches. Then fold these longer strings in half. You now have 4 strands of 10 inches as before, but at one end they are connected. At that connected end, tie an overhand knot and you’ll have a loop. Do all your knotting and then at the other end tie on a button.
Very helpful, thank you!
So, what does it mean by repeat one knot for a spiral braid? Does it mean repeat every knot (of each color) twice or … what? I’m confused.
There are two knots in the picture. One is labeled Knot One and the other is labelled Knot Two.
If you want a flat braid, do Knot One, then Knot Two, then Knot One, then Knot Two, etc.
If you want a spiral braid, do Knot One, then Knot One again, and again, and again.
If you practice, you will begin to get a feel that Knot One and Knot Two are the exact same knot but in reverse. Then it will make more sense that you do one and then the other, the alternating of them will make it lie flat, but if you do the same one over and over, it causes the twist.
I used to do this years ago. Thank you for sharing it. It was very helpful
Thank you for posting both the questions and replies! Very helpful indeed! Im off to begin!
Any suggestion what to put on the ends after cutting to keep them from fraying? I am doing the closer where you use a separate piece and make square knots in 5ge middle to ‘slide’
Hi,
There are various beading glues that would work for this purpose, or an anti-fray spray that is designed for sewing. Some people use clear nail polish or diluted white glue. You can experiment to see which method you like the most. If you are using nylon rather than hemp, you can heat the ends to melt them together. Hope this helps!