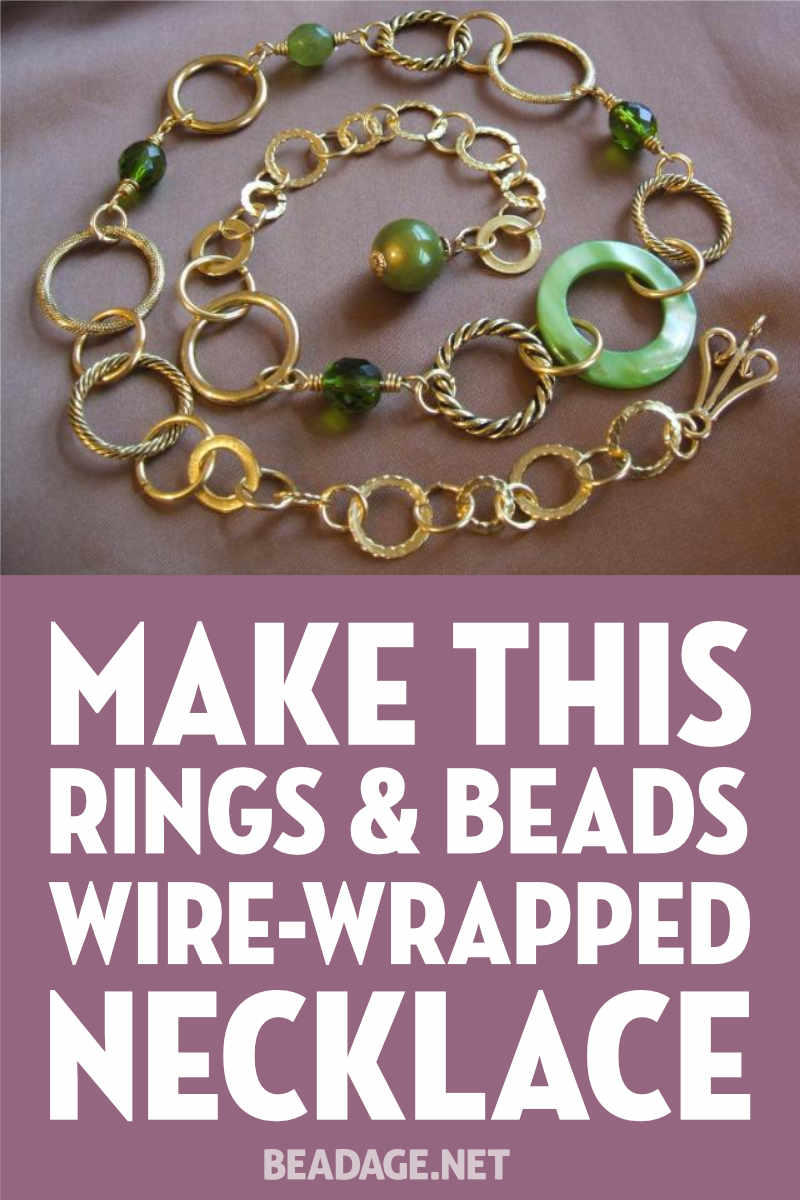
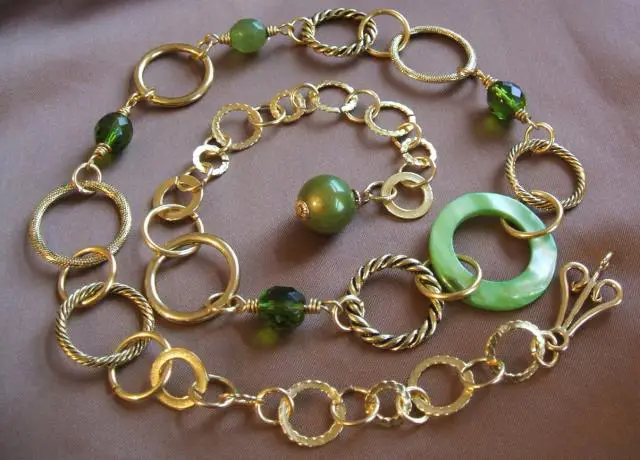
This is a simple project with a lovely result! The key to this design is to keep certain dimensions the same–the color of the jump rings, the color of the beads–and varying other dimensions–the size and style of the jump rings, the size and style of the beads.
Supplies
Tools
Materials
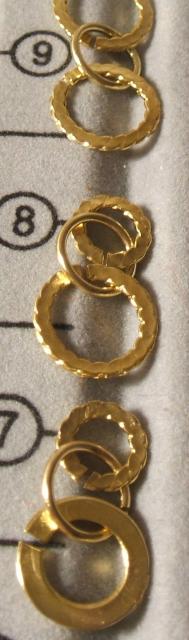
- a mix of jumprings — 7mm, 9mm and 14mm – of various textures and design. The quantity depends on how long you want the necklace to be. There are some interesting mixes at Fire Mountain Gems.
- 20 gauge wire
- several glass beads of a single color, but different finishes
- a donut bead of the same color
- a hook clasp (just the hook part is needed)
Instructions
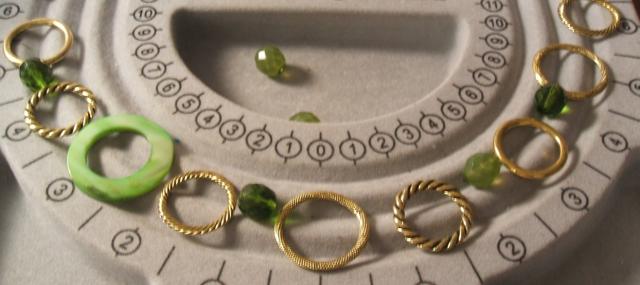
Arrange the circles on your design board as you determine how you want your necklace to look. Consider placing your simplest and smallest rings at both ends of the necklace, as you move toward the clasp, and use your bigger, more textured rings and your glass beads more in the center of your necklace.
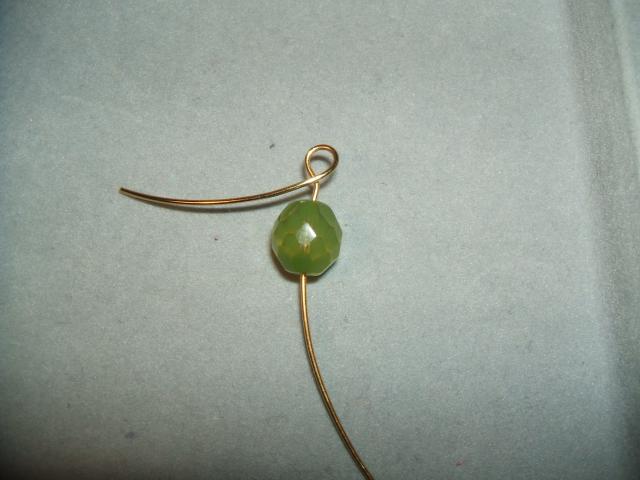 Once you’ve arranged your rings and beads, begin to wire wrap the eyepins that you will use with your glass beads. Cut a length of wire about 3 or 4 inches long. Slide on your bead. Make a loop at one end of the wire, but leave an extended tail that will wrap the wire around itself, as shown. I usually do about three or four times around, when wrapping.
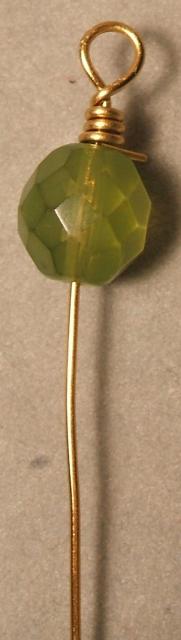 Snip off any excess wire and do the same with the other end. You should end up with a double-wrapped eye pin with your glass bead in the center. Do this with all of your glass beads, and put them back in the arrangement around your design board.
 Next, use the jump rings to connect your rings and your double wrapped eyepins in the order you have arranged on your design board. When you’ve finished connecting all your rings and beads, add the hook clasp with a small jump ring at one end of the necklace.
On the opposite end of your necklace, add one last bead as a decorative end bead. Place this bead on a headpin and make a loop at the end and attach it to the smallest size jump ring, which will attach to another gold ring in the necklace. The necklace is adjustable–hook the clasp on whichever ring you like, depending on how long you want the necklace. The added length will hang down.
Use extra caution and be sure that your all of your rings are tightly closed and that any rings that have openings will not allow other rings to slip through those openings. Otherwise you leave open the possibility of your rings coming undone at any given point, so use extra care. Enjoy!


 | Shop jewelry making and beading supplies, tools & findings for DIY jewelry making and crafts. #jewelrymaking #diyjewelry #jewelrycrafts #jewelrysupplies #beading #affiliate #ad")


Very nice! I like the color and the creative way you used so many rings. Varying the size and shapes of the rings gives the necklace a very interesting and unique look.
Thanks! This was a really fun project. Who knew simple rings would be such fun?
Happy Beading,
Michele
Love the idea of using different kinds of rings. Very creative!
Thanks…glad you enjoyed!:)
Michele
Hi Michele…your work is simply lovely. Could you tell me where I could purchase some of those nice quality jump beads? Been to Michael’s, but don’t recall seeing them there. Thanks, Caroline
Hi Caroline,
Hmmm…Michael’s is where I got those jump rings/beads; but that’s been a while ago now. I’d say check other local bead shops. Maybe there’s something even better out there now! 🙂
Michele